+1 829 698 0733
What Do You Need? Talk To Us
8am-4pm EST/NY Monday-Friday info@aareff.com
User Manual
Manual Usario
Complete
Systems
FM
Transmitters
Studio
Equipment
Kits and
Modules
Antennas
Filters
Other
Products
BACK TO
MAIN MENU
1W EIRP
SYSTEM
2W EIRP
SYSTEM
10W EIRP
SYSTEM
20W EIRP
SYSTEM
30W EIRP
SYSTEM
50W EIRP
SYSTEM
100W EIRP
SYSTEM
250W EIRP
SYSTEM
500W EIRP
SYSTEM
1kW EIRP
SYSTEM
2.5kW EIRP
SYSTEM
5kW EIRP
SYSTEM
10kW EIRP
SYSTEM
25kW EIRP
SYSTEM
50kW EIRP
SYSTEM
100kW EIRP
SYSTEM
BACK TO
MAIN MENU
100mW FM
TRANSMITTER
1W FM
TRANSMITTER
10W FM
TRANSMITTER
20W FM
TRANSMITTER
30W FM
TRANSMITTER
50W FM
TRANSMITTER
100W FM
TRANSMITTER
250W FM
TRANSMITTER
500W FM
TRANSMITTER
600W FM
TRANSMITTER
1kW FM
TRANSMITTER
2kW FM
TRANSMITTER
10W FM
AMPLIFIER
30W FM
AMPLIFIER
50W FM
AMPLIFIER
100W FM
AMPLIFIER
250W FM
AMPLIFIER
1kW FM
AMPLIFIER
BACK TO
MAIN MENU
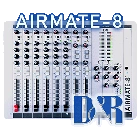
AIRMATE 8
CONSOLE
AIRLAB DT
CONSOLE
WEBSTATION
USB
AIRLITE
MK2
AIRENCE
USB
DIGITAL
BARIX STL
AUDIO
LIMITERS
DIGITAL
10KM STL
BACK TO
MAIN MENU
RDS AND
STEREO CODER
1W PLL
EXCITER
STEREO
CODER
AUDIO
COMPRESSOR
BACK TO
MAIN MENU
MAG
MOUNT
SINGLE
DIPOLE
4.8dBi 2
DIPOLES
7.8dBi 4
DIPOLES
10.8dBi 8
DIPOLES
4.8dBi 5/8
ANTENNA
BROADBAND
DIPOLE
3kW CIRCULAR
ANTENNA
2,4 AND 8 WAY
CIRCULAR
ANTENNA
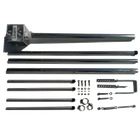
ACCESSORIES
1kW CAVITY
FILTER
200W CAVITY
FILTER
BACK TO
MAIN MENU
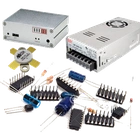
SPARE
PARTS
POWER
SUPPLIES
CUSTOMERS
ABOUT
CONTACT
TECH
TERMS
©2026
Aareff Systems
0.00762701034546
 +1 829 698 0733
What Do You Need? Talk To Us
+1 829 698 0733
What Do You Need? Talk To Us